Monday, April 29, 2013

Things that worked

I am on a roll people! Pinterest RECIPES are all working out great for me. Dan said the other day that Pinterest is great if I stay away from the crafts! Last week we ate at least 1 Pinterest recipe per day and sometimes 2! :) Thought I'd share some good ones

First is pancake mix. Do you know what's in pancake mix? Probably things you wouldnt' feed to your guinea pig or pet rat. Lots of creepy additives (aluminum) and preservatives (sodium benzoate). Now I am not going to get on my high horse and be all "granola" here. Our family eats plenty of foods with preservatives, but when there is an alternative that actually tastes better  and costs less--we are taking that road.

So this recipe is actually Pinterest inspired not exactly copied though. I found a TON of pancake mix recipes on there but none exactly suited our lifestyle (many use buttermilk--I'm not even 100% sure what that is). So I put a few together and added some stuff and WHOAH, it's delicous! Cameron went to town and so did Dan and I. They are MUCH more filling than traditional pancakes made from mix,  because they have milk and eggs in them instead of just water.

DIY Pancake Mix

Ingredients

  • 4 cups flour
  • 2 teaspoons baking powder
  • 1 teaspoons baking soda
  • 1.5 tablespoons sugar
  • 1/2 heaped tablespoon salt
Directions
Step 1
In a bowl stir all together. Transfer to a sealed container. Shake well before each use. You are done if you just want the mix. If you are ready to make pancakes, follow the directions below.

Ingredients (makes about a dozen pancakes--you can half this if you want less pancakes)

  • 2 cups Easy Homemade Instant Pancake Mix
  • 1/4 teaspoon cinnamon
  • 2 cups milk
  • 2 eggs
  • 1/4 cup sour cream
  • 1 1/2 teaspoon vanilla

Directions

Step 1
In a bowl whisk together all except the pancake mix until well blended. Gently add in the pancake mix and stir just until just blended. Do not over mix--it will be chunky.

Step 2
Heat a buttered griddle on medium heat cook pancakes like you normally would. They will bubble up when ready to flip. YUM!


No picture, sorry folks, Sunday mornings I am half awake and forgot to take pictures
_________________________________________________________________________

Next up---delicous chicken that I found on Pinterest. Dan has been craving fried chicken, and since
a. I do not make fried chicken
b. fried chicken is terrible for us

I thought this might be a good substitute! Baked Parmesan Ranch Chicken

Yum Yum Yum. That's all I can really say. I thought I had made enough to have leftovers for lunch the next day, I was wrong. Dan was actually (no joke) picking the crumbs off the pan and eating them long after Cameron and I had left the kitchen. I bought a big ole' box of Corn Flakes at Aldi (that's another obsession, if you havent' shopped there, you are wasting your money--we don't shop there for everything, but many things, like baking and cooking items, are about 30-40% cheaper than at Cub/Target) and I will have them for many many more times of cooking this meal. Actually, I think next time I make this, I may quadruple the recipe for the coating and then just store it for next time, so it can be a quick and easy meal.
_____________________________________________________________________--

Lastly is something that I have made twice already and they are gone in the blink of an eye at our house. So for this recipe, I did buy into the fad of "quinoa." First I had to trek to Trader Joe's to find out exactly what quinoa was and where I could find it in that place, but a very nice (however, not knowledgable) man pointed me in the right direction. I have been making Egg Muffins for Dan and I to grab in the morning on our way out the door, but wanteed to try something with more fiber/protein in it as well. So I ran across this recipe for Quinoa Bites. It's actually a gluten free recipe, but you can use regular flour if you are not GF. So this is the picture of what I was aiming to create.
Now there is definitely work involved in making these, because you have to boil the quinoa first (like rice) and then blend it all together and bake. But it is so worth it.

This is after boiling the quinoa and adding the egg and flour.


Here is after adding the parsley and carots.


And the finished product.

We don't serve these with any dressing/sauce on the side, but they are just as good. The first two times I made these, Dan ate 4-5 while they were cooling on the counter. I find that I am full after only 2 of them and it sustains me (even with the caloric needs of breastfeeding ) until lunch no problem.


Tuesday, April 23, 2013

I do not like you Martha Stewart

I should have known better than to follow a Martha Stewart recipe. I bet she has a whole team of staffers that all they do is take pictures of her food and photoshop them to death. I guarantee you the food does not look like these pictures in real life, they are just a rouse to make you feel bad about yourself and your cooking and to buy more of her cookbooks! :)

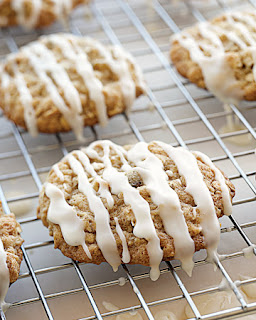
So this was the recipe I was attempting. "Iced Oatmeal Applesauce Cookies." YUM! It was for a family gathering where I volunteered to bring dessert--so the pressure was on for it to be edible. Now, I did use regular applesauce instead of chunky, but that was not the issue. The cookies themselves turned out great, Dan was eating them long before I had the icing ready. The aformentioned "icing" was the issue.
See in the picture above how the icing is WHITE?? Well when you mix something white (powdered sugar) and something brown (pure maple syrup) together, you will not get something WHITE. It just doesn't happen. Blue and orange don't make green. Purple and black don't make yellow. I think Martha's photoshop staff need to go back to school on this one :) So my frosting was a yellowish/clear color, as I would expect it to be, from my education on colors in Mrs. Trapp's kindergarten class. So I tried adding more and more and more powdered surgar, but that wasn't the answer either. So I just went with it. Folks said they were reaaaaally good with the clear colored frosting, but I was too upset at Martha to eat any.


Here is where I realized I had an issue. See how the icing is like a clear/tan color?


This is a bad picture, but this is after they dried. Didn't look too shabby and folks said they were really good, but I am still on strike from MS recipes! :)

Monday, April 15, 2013

2 steps is my max

So, as has been made evident by my first few blog posts, I have struggled with Pinterest. So I thought I needed to go back to the basics, find some quick/easy projects to get my confidence back up. But what are "easy" projects on Pinterest? I decided to go with things that have 2 steps or 2 ingredients....and, boy-oh-boy, I am good at the "2 steppers!!"

First off was a night after work when my parents decided to stop by since they were in the area. They were bringing pizza but I figured I should have some dessert, but had little to nothing in the house. Found this recipe for Pineapple Angelfood cake ( bonus, not too terrible for my waistline).  I happened to have the 2, YES TWO, ingredients and stirred the together and waaaala!
This is before it went in the oven.


I thought it was a good sign that it looked like the picture (usually mine do not). Here is the finished product! My parents really liked it and I threw some whipped cream on top because everything is better with whipped cream. Pinterest:3 Rachel:1. I'm coming back folks!


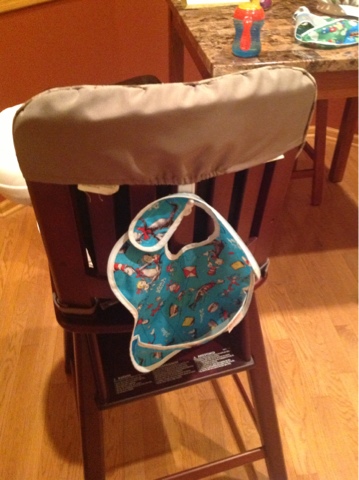
The other project (which can hardly qualify as a project) I actually did months ago when we put Cam in a high hair, but had to include tie in this post because it actually worked. 2 steps; peel and stick. Thanks 3M for making such a great product, bonus that Even I am smart enough to figure out this Pinterest idea!

Monday, April 8, 2013

The never ending project

This one is still a work in progress, but has been retired to the back bedroom (where crafts go to die) because it was collecting dust on the dining room table for 1/3 of Cameron's life and that's where I draw the line!

It was supposed to look like this.


You may be thinking to yourself "Did she learn with the first handprint disaster?" Your thoughts would be of sound mind, however, mommy was not of sound mind on this day. Once again, mommy got caught up in the "I CAN DO THAT" mentality.

For this project, I went, on my own accord to Home Depot! (I know right??!?!)  I wandered into the back where they cut all the boards, waded through the sawdust and scraps and found the PERFECT sized board--FREE in the scraps bin. Now, if you know me, you know that "free" should have been my middle name, because I LOVE LOVE LOVE free things. I went giggling out of the store and home to show off my great find. Dan was less than impressed. I wonder why?

Well, long story short, after 8 coats of red paint, 6 different stencil kits, and a baby covered in white paint; this is where we ended up. I still cannot find the right sized wooden heart to put there! I have purchased 2 different ones and drug my infant to 4 different craft stores. Finally after 2 months of sitting on our dining room table, Dan drew the line and this project made it's new home in the back bedroom. Sad. Just plain sad. Pinterest: 3. Rachel: 0.


"There is no such thing as a wire snips!"

The title of this blog post pretty much says it all. I kept insisting to Dan that I needed a wire snips to make my latest project and he kept telling me there is no such thing. He was laughing so hard while trying to tell me in every way possible that they didn't exist.

Let's back up a little bit. First, I found this and thought maybe I could tackle it. How cute right?

Ok, how can I go wrong with this one? It's just a mason jar, a soap dispenser, a wire snips (figured Dan would have one of those) and some paint. So I tolled on over to the local Joann Fabrics and bought 2 mason jars for $1.29 each and pretty much sprinted back home to try to hammer out this "quick and easy" craft.

So it starts when I read the "how to" and it says to make a hole in the mason jar lid in a circle to fit the soap dispenser (I used one I already had from a Bath and Body Works soap.) The way that this gal says to make the hole is by using a "wire snips." So I casually ask my hubby if he may own a pair of these aforementioned "wire snips." He immediately gives me a suspicious look and says "this better not be for a Pinterest project!" Sheepishly, I say "welllll this one is REALLY quick, I will be done before Cam gets up from nap!"  Then begins the argument about whether or not there is actually such a thing as wire snips. Dan gives me a pliers (since apparently wire snips do not exist--at least at the Jokela house) and I set off to make this super easy little hole *this is what it was supposed to look like*
Unfortunately, this is what MINE looked like, without these elusive wire snips. I also about lost a finger in the process. 

Meanwhile my supportive husband is laughing so hard he was convulsing and I think I even heard a snort or two during the fits of laughter from the other room. 

Well the issue is, once you make the hole, like cutting hair, you cannot go back. Well the hole should have been the size of a quarter and it was the size of Rhode Island. All of the sudden, like Murphy's Law, the baby awakens down the hall. SHOOT!

I quick cram the dispenser into the gigantic  hole and throw it on the sink. It was beyond repair. It's still sitting there because, like the "genius" I am, I threw away the original one. Ugh! The real bad thing is that since the hole is too big for the dispenser, it doesn't hold suction, so you can only do 1 pump and then it gets stuck and you cannot pump any longer. So not only was this project a complete waste of time, it is now a pain in my rear every time I want to use soap--which is quite a few times per day :) 


Doesn't look too bad from afar. Just don't get too close :)

Can a 6 month old be crafty?

This was actually one of my first Pinterest fails, so I thought I would share, even though it was a few months ago, because I think we are still digging red paint out of Cameron's nails! :) 

This is what we were attempting to make. Thought it would be cute for the Grandparents for valentine's day. So I bought some red paint, card stock and off we went. *It is worth mentioning that my husband thought this was a very bad idea.*

I thought I would just take Cam's hand, dip it in paint, press it on the paper and then Dan would walk him calmly over to the sink and wash his hands. Repeat with the other hand and both feet. Wellllllll.....it didn't exactly work that way, as is evident from this picture!  That's Dan trying to hold him and he is covered in paint. By the time we got him to the sink he was chewing on his hands, which were also covered in paint! With only 1 hand done, he needed a full bath and we dyed the tub red.


Here is the finished product after trying numerous different ways of getting him to keep his fist open long enough to get his hand print. 


 I am not sure if the lady who did this originally gave her kids some Benedryl before doing this or if they were asleep at the time, but there is NO chance an average 6 month old can make a cute handprint. The only good thing about this adventure was that Mommy did think to buy non-toxic paint! :)

Friday, April 5, 2013

Should mac and cheese taste cheesy?

The answer is YES! However, this Pinterest fail did not. I thought it was awfully harmless and therefore did not even have a back up frozen pizza at the ready--my mistake. This is what I was "Attempting" to make Broc Mac and Cheese. I thought to myself "how can I go wrong?" Even Dan thought it looked good and chipped in on making it (don't get too excited--he didn't exactly volunteer).
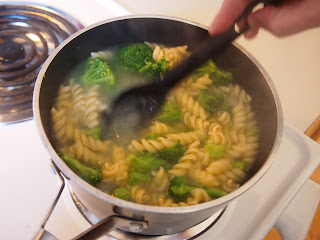
Doesn't he look thrilled? :)  As you can see, we have 2 pots going at once, one for the noodles and broccoli and one for the sauce which starts out as just butter and onion and then you have to add flour and make it into a "roux." Now this is where I should have stopped. When words like "roux" are used in the recipe and more than 2 pots are needed, ABORT THE MISSION. Instead, like good Pinterest soldiers, we plowed forward.

I actually got the "roux" to work pretty well and the sauce started thickening.

Then you need to add a boatload of cheese. I mean, I thought to myself "how many cows were milked to get all this cheese? YIKES!"  But I thought at least it would be cheesy right? Wrong.

Here is a look before we added the cheese. The broccoli was really good--super moist and juicy, but the pasta had negative flavor. "Negative flavor" you ask. Negative, I say. If a weight watchers frozen meal is a 1 on the flavor scale, this was a -3. I actually think that blending some chopped up cardboard into it MAY have helped the flavor :)  

Now you may wonder why there is no picture of the final product. That is because I was too disheartened and peeved to take one. 

Moral of this blog post: Just because it LOOKS good on Pinterest, it may not be and you may have 2 people slaving over the stove for 25 minutes for a lack luster outcome. Boo! Pinterest: 1--Rachel: 0.